I get quite some questions regarding the water household in the new paludarium. When I try to explain, I was always like “wish I had a picture of this”. And now I do!
Introducing “The WaterWorx”
The WaterWorx is a compilation of all water management related things that drive the paludarium. It consists of pumps, valves, tubes, containers, level sensors and things like a reverse-osmosis unit. All of these things are controlled by Artemis, the embedded controller (that is actually Arduino based). The Raspberry Pi on top of Artemis also does some monitoring and higher-level controlling as well. To just drop you an image of the WaterWorx, here it is:
One of the tricks I have been using to keep things growing everywhere in the paludarium is by regularly watering the background. In this post I will describe how I made a spray bar and how I mounted it inside.
The idea
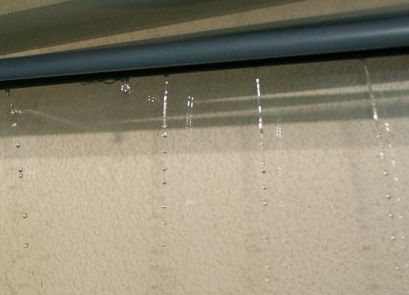
In order to get water onto the background and have it nicely sift through I have been using a 12mm PVC tube with a series of 1.5mm holes drilled into it. Really simple, and works well even with the smallest of pumps:
Example from an older setup on how to use a spray bar
If you want a paludarium where plants will grow under water, I have learned you need to separate the aquatic water system from the “land” water system. The sewer-dump does just that.
The idea is that any water you add in the aquatic part which is too much will overflow in the sewer-dump. Watering the backdrop for example comes from the sewer dump. Any water falling on the (yet to build) land portion will be dumped here as well.
This accomplishes two things: A steady water level and a clean aquatic water world!
1. A steady water level
Anyone who owns a paludarium will know: The water levels tend to fluctuate constantly. Evaporation, adding water, it just varies all the time. How to solve this? Well, just add water on a regular basis (aka automated!) and make sure the water can overflow from the aquatic part. Like some cool infinity pool that keeps the water level at a constant. Excess water overflows into the sewer-dump section.
2. Clean aquatic water
Over time inside a paludarium soil will form. You can choose to add soil, or to leave it out… But as the paludarium becomes bio active rotting leaves will form soil. Lots of nutrients, but that will simply overpower the aquatic section. Too much nitrates and phosphorites will kill fish, ruin plant life, and if you are unlucky cause algae to massively bloom instead.
How to make sure that won’t happen? Divide the water systems! The sewer-dump recycles any water for the land portion. Any water from the land portion should flow back into the sewer-dump as well. Aquatic water that is “too much” flows in there as well.
What the sewer-dump looks like
So the sewer-dump in itself is pretty basic: It is a sealed-off portion of the paludarium by glass. I used to have a glass “wall” 10cm from the rear for this, but in order to maximize the aquatic water section this time I decided to make a really small sewer-dump:
The sewer-dump: Nothing more than three glass plates separating the aquatic water system from the “landmass” water system
The trick is of course that these pieces of glass have the exact height of the water level you require inside; in my case it is 5mm below the front window vent.
You can see that there are three PVC feedthroughs; one outside the sewer-dump and two inside. The one outside is used to draw water from the aquatic part into the external canister filter (notice the 3D printed filter cap on the right) so it obviously needs to sit in the aquatic part.
The one in the middle is used for the canister filter return line. Water gets pumped in through the long PVC tube you see in the picture above, which ends up in a (yet to construct) waterfall. That waterfall flows back into the aquatic section closing the loop. It is vitally important that no water gets “spilled” into the sewer-dump in this process!
So where does the excess water in the sewer-dump go?
The PVC tube on the left in the picture above is the real trick: Any excess water will flow through this pipe (in the picture the 20mm PVC tube is too short; I need to order more 😉 ). It will flow out of the paludarium eventually into the sewer (the real world sewer that is). I will capture excess water into a small canister under the paludarium which I will empty using a pump with 6mm hose that goes to the sewer (unfortunately the location of the paludarium is in the mancave, meaning it sits lower than the sewer system in the house).
Finally. After a long time building the hardware and the software, the Neptune module is the final module to be added to the Paludarium.
This module is a more complex version of the Apollo units that live inside the Canopy that control lighting and fans. The Neptune module has some control for lighting (namely the underwater lights), but its main purpose is controlling pumps and valves, and measuring back sensors in the paludarium.
For now the Neptune module is setup in the cabinet under the Paludarium:
The Neptune module sitting in the cabinet under the Paludarium with some sensors already connected. What a mess of wires and hoses!
The unit has been running for over two weeks now without a single flaw… I must be doing something right 😉
People are often confused what things are all in the paludarium, what they are called and what they do. In this blog post I’ll explain the different components (sub projects if you will) that make up the paludarium today.
A quick overview
In order to get the paludarium working as it works today, I had to run several different projects and put them all together. First I’ll quickly list all the different components:
The Cabinet – The custom-built cabinets that hold the paludarium;
The Paludarium – The glass structure that holds water and air (the paludarium is a closed construction);
The Land part – The part above water. Filled with tropical plants, and for now no animals here;
The Aquatic part – The front underwater part of the paludarium, where the fish live;
The Sump – The rear underwater part. Any excess water from the Aquatic part is dumped here, and the plants living on the background panel get their water from here (and return it there too);
The Waterworks – The board in the cabinet that holds all the plumbing (water valves etc);
The Canopy – The intelligent armature sitting on top of the paludarium;
PaluPi – A standard Raspberry Pi with an RS232 level converter that sits inside the Canopy and handles all the “smart thinking”;
Apollo units – Named after the god of light, there are around 12 of these units inside the Canopy, each handling up to 4 leds, halogens, TLs or fans;
Neptune module – Still under development, this unit controls all pumps, valves etc in the Waterworks;
Quite a list right? Everything in this list had to be tuned Read more »
As the paludarium slowly got all parts in place, I set myself a goal: I wanted to have it filled with water on my birthday! That proved to be a LOT of work; but it paid off! In this blog post I’ll show you the final tidbits that made the paludarium ready to contain water.
background and waterfall
The background now has two layers of epoxy where I poured this jungle soil over the epoxy. The result is almost covering the background, and not that much white is showing (from the styrofoam). Now it was time to glue the background in! I used aquarium silicon glue for this:
The background being glued in place. Note the stick under the background to make sure it stays in place.
Note the stick that holds the background in place while the glue dries. With that done, it was on to Read more »
One of the last things to build and test with all the water stuff, was rain. So I added a small installation with sprinklers that get fed directly from the tap water.
Rain Down On Me
The rain installation is controlled electronically (duh!). On the WaterWorks under the paludarium, I have one electromagnetic valve that can be opened to feed the rain installation:
The magnetic valves on the WaterWorks. The one on the left controls the osmosis filter, the center one inputs tap water into the aquatic part, and the rightmost has now been connected with a thin black tube to allow for rainfall.
The valve on the right has now been connected as well with a thin black tube. This tube is fed upwards, and Read more »
Today I filled the paludarium fully. Now the water levels are exactly as projected, and overflow neatly into the sewer if there is any surplus.
Filled up
Fully filled, the paludarium weighs around 370 kilos right now. And I still need the Canopy on there, sand inside… But the cabinet is holding up perfectly. Nothing bending through, nothing giving way.
If the tap water or the reverse osmosis unit is turned on, it fills the aquatic part. The aquatic part overflows in the dirty-water part in the rear. If that overflows, it is dumped straight into the sewer:
Detail of the sewer pipe in the paludarium. Any access water will flow straight into the sewer. Note how the water is exactly leveled to the edge of the drain.
The inside of the paludarium is a bit of a construction site right now. It looks like this:
Water in the paludarium fully filled. The aquatic part left is about to overflow to the dirty-water part (right) and in turn that water is drained to the sewer.
Hoses ‘n stuff
There are a lot of hoses inside the paludarium Read more »
Today it was finally time… All the puzzle pieces for the WaterWorks could be put together! After testing the WaterWorks for leaks, it was time to mount the board under the paludarium, hook things up and test… For the very first time actual water inside the paludarium!
Mounting the WaterWorks
The waterworks were build on a separate board, outside of the paludariums cabinet. All parts that need to be under the paludarium that handle water are mounted here. The WaterWorks look like this:
The Paludarium WaterWorks. This board is mounted under the paludarium and it handles the water household.
Today I mounted this board in the cabinet under the Read more »
I am so happy with my Raspberry Pi now able to obtain real-time measurements from the La Selva biological station. As much as this station measures, it does not measure water temperature. Time for some geeking out!
What I DO have
So the measurements I do get from the biological station are basically all the ingredients I need to synthesize the water temperature. Especially these values will determine the temperature:
Light Intensity;
Air Temperature;
Rainfall;
Previous Water Temperature.
I want to use some kind of calculation to create a synthetic water temperature. I’m assuming sunlight will heat the water. The water temperature will somewhat follow the air temperature. Finally rain will seriously cool down water.
Making up a formula to synthesize water temperature
Forming a formula that synthesizes water temperature is kind of hard to do. There are so many variables. In the wild, water will come flowing in from somewhere else. Deep water will flow slowly, and hardly heat up under sunlight. A small pool of 10cm of water will heat up extensively, unless it streams fast.
It is almost impossible to work with all these variables. So I figured to just build a simulation formula, and see how the water temperature will develop as I run through the days. I started out with a formula like this:
The first line will increase the water temperature from the last sample with (Light/factor). This is the heating of the water by the influence of sunlight.
The second line first calculates the difference between air and water temperature. The further apart, the bigger the effect will be. After dividing by a factor, I add this difference to the water temperature (this cal either heat or cool down the water)
The third line first calculates the difference in temperature between the water and the rain. Then I multiply this number by the number of millimeters of rain (more rain = more cooling). In case the rain is warmer than the water (should never occur), I do nothing.
Finally I subtract the calculated value from the water temperature divided by another factor. I use these factors to tweak and tune the simulation.
The result
I still have to look at the effect in a longer run, maybe import a few weeks of simulated data into excel and graph it out. So far it seems to behave pretty well… Simulated temperatures normally run from 24 degrees centigrade (early morning) up to 27.5 degrees centigrade in the late afternoon (4PM). Rain cools it down 1-2 degrees. When looking at heavy rainfall (like September 11th 2013 where there was over 70mm of rainfall in 1,5 hours), the simulation delivered a water temperature of 21.4 degrees centigrade. Not bad at all!


 RSS
RSS LinkedIn
 Twitter
 Email
Email
Nice post, thanks !